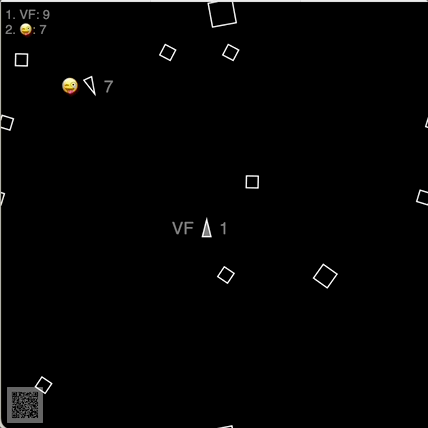
This comprehensive tutorial will guide you through building a complete multiplayer game using Multisynq. You’ll learn how to create a 2D space game with asteroids, spaceships, shooting mechanics, collision detection, scoring, and persistence.

Multiblaster Game

🕹️ Play the Game

Click here to play the full game - then scan the QR code or share the generated session URL to invite other players!

Tutorial Overview

This tutorial is structured as a progressive series of steps, each building upon the previous one. You’ll start with a simple asteroid simulation and end with a fully-featured multiplayer game:

  1. Step 0: Basic asteroids (non-Multisynq)
  2. Step 1: Synchronized asteroids with Multisynq
  3. Step 2: Interactive spaceships with player controls
  4. Step 3: Shooting mechanics with blasters
  5. Step 4: Collision detection and asteroid destruction
  6. Step 5: Ship-asteroid collisions and debris
  7. Step 6: Scoring system
  8. Step 7: View smoothing for 60fps animation
  9. Step 8: Persistent highscore table
  10. Step 9: Mobile support and final polish

Each step includes full source code and a live demo so you can see the progression and test each feature as you build it.

Game Features

The finished game includes:

  • Multiplayer synchronization - All players see the same game state
  • Player-controlled spaceships - Arrow keys or WASD for movement
  • Shooting mechanics - Space bar to fire blasters
  • Collision detection - Blasters destroy asteroids, asteroids destroy ships
  • Scoring system - Points for destroying asteroids
  • Persistent leaderboard - Highscores survive code changes
  • Mobile support - Touch controls for mobile devices
  • Smooth animation - 60fps rendering with view smoothing
  • QR code sharing - Easy session sharing between devices

Step 0: Asteroids Floating Without Multisynq 🪨≠🪨

📖 Step 0 Resources

This is a non-Multisynq app showing asteroids floating through space. If you run this in two windows, the asteroids will move differently - they’re not synchronized.

Each asteroid has position (x, y) and angle (a) properties, along with delta values (dx, dy, da) for movement:

move() {
    this.x = (this.x + this.dx + 1000) % 1000;
    this.y = (this.y + this.dy + 1000) % 1000;
    this.a = (this.a + this.da + Math.PI) % Math.PI;
    setTimeout(() => this.move(), 50);
}

The % operator ensures objects wrap around the screen edges - when they leave one side, they appear on the other.

Drawing is done with simple white strokes on a 1000×1000 canvas:

for (const asteroid of asteroids) {
    const {x, y, a} = asteroid;
    context.save();
    context.translate(x, y);
    context.rotate(a);
    context.beginPath();
    context.moveTo(+40,  0);
    context.lineTo( 0, +40);
    context.lineTo(-40,  0);
    context.lineTo( 0, -40);
    context.closePath();
    context.stroke();
    context.restore();
}

This file has about 80 lines of code total.

Step 1: Asteroids Synchronized with Multisynq 🪨≡🪨

📖 Step 1 Resources

Now we add Multisynq synchronization! The asteroids will move exactly the same in all browsers and devices.

The app is divided into two parts:

  • Model: The synchronized part (Multisynq.Model) - shared computation
  • View: The display part (Multisynq.View) - local rendering
class Asteroid extends Multisynq.Model {
    move() {
        this.x = (this.x + this.dx + 1000) % 1000;
        this.y = (this.y + this.dy + 1000) % 1000;
        this.a = (this.a + this.da + Math.PI) % Math.PI;
        this.future(50).move();  // ← Key difference!
    }
}

Critical concept: The computation looks exactly the same! No special data structures are needed. The only change is this.future(50).move() instead of setTimeout().

Future Messages

The key innovation is the future() method:

this.future(50).move();

This schedules the move() method to be called again in 50ms, but synchronously across all clients. This is how you define an object’s behavior over time in Multisynq.

Session Joining

The last few lines connect to a Multisynq session:

Multisynq.Session.join({
    appId: "your-app-id",
    password: "your-password",
    name: "multiblaster-tutorial", 
    model: Game,
    view: Display
});

This version has only 20 lines more than the non-Multisynq version from Step 0.

Step 2: Spaceships Controlled by Players 🕹️➡🚀

📖 Step 2 Resources

Now we add interactive spaceships! Each player gets their own ship when they join.

Player Management

The game subscribes to join/exit events to manage players:

class Game extends Multisynq.Model {
    init() {
        this.ships = new Map();
        this.subscribe(this.sessionId, "view-join", this.viewJoined);
        this.subscribe(this.sessionId, "view-exit", this.viewExited);
    }

    viewJoined(viewId) {
        const ship = Ship.create({ viewId });
        this.ships.set(viewId, ship);
    }

    viewExited(viewId) {
        const ship = this.ships.get(viewId);
        this.ships.delete(viewId);
        ship.destroy();
    }
}

Ship Controls

Each ship subscribes to input events from its specific player:

class Ship extends Multisynq.Model {
    init({ viewId }) {
        this.left = false;
        this.right = false;
        this.forward = false;
        this.subscribe(viewId, "left-thruster", this.leftThruster);
        this.subscribe(viewId, "right-thruster", this.rightThruster);
        this.subscribe(viewId, "forward-thruster", this.forwardThruster);
        this.move();
    }

    leftThruster(active) { this.left = active; }
    rightThruster(active) { this.right = active; }
    forwardThruster(active) { this.forward = active; }
}

View Input Handling

The view publishes input events to control the ship:

document.onkeydown = (e) => {
    if (e.repeat) return;
    switch (e.key) {
        case "ArrowLeft":  this.publish(this.viewId, "left-thruster", true); break;
        case "ArrowRight": this.publish(this.viewId, "right-thruster", true); break;
        case "ArrowUp":    this.publish(this.viewId, "forward-thruster", true); break;
    }
};

Key insight: Publish/subscribe in Multisynq is used for view-to-model communication, not for synchronization between devices. The synchronization happens automatically!

Step 3: Firing a Blaster 🕹️➡•••

📖 Step 3 Resources

Add shooting mechanics! Press the space bar to fire blasters.

Blaster Creation

When firing, the ship creates a new blast moving in its direction:

fireBlaster() {
    const dx = Math.cos(this.a) * 20;
    const dy = Math.sin(this.a) * 20;
    const x = this.x + dx;
    const y = this.y + dy;
    Blast.create({ x, y, dx, dy });
}

Blast Lifecycle

Blasts automatically destroy themselves after a timeout:

class Blast extends Multisynq.Model {
    init({ x, y, dx, dy }) {
        this.x = x; this.y = y;
        this.dx = dx; this.dy = dy;
        this.t = 0;
        this.game.blasts.add(this);
        this.move();
    }

    move() {
        this.t++;
        if (this.t > 30) {
            this.destroy();
            return;
        }
        this.x = (this.x + this.dx + 1000) % 1000;
        this.y = (this.y + this.dy + 1000) % 1000;
        this.future(50).move();
    }

    get game() { return this.wellKnownModel("modelRoot"); }
}

The wellKnownModel("modelRoot") pattern provides access to the main game object from any model class.

Step 4: Break Up Asteroids When Hit by Blasts 🪨➡💥

📖 Step 4 Resources

Add collision detection! When blasts hit asteroids, they break into smaller pieces.

Collision Detection

The game runs collision detection in its main loop:

mainLoop() {
    for (const ship of this.ships.values()) ship.move();
    for (const asteroid of this.asteroids) asteroid.move();
    for (const blast of this.blasts) blast.move();
    this.checkCollisions();
    this.future(50).mainLoop();
}

checkCollisions() {
    for (const asteroid of this.asteroids) {
        const minx = asteroid.x - asteroid.size;
        const maxx = asteroid.x + asteroid.size;
        const miny = asteroid.y - asteroid.size;
        const maxy = asteroid.y + asteroid.size;
        
        for (const blast of this.blasts) {
            if (blast.x > minx && blast.x < maxx && 
                blast.y > miny && blast.y < maxy) {
                asteroid.hitBy(blast);
                break;
            }
        }
    }
}

Asteroid Destruction

When hit, asteroids split into two smaller pieces:

hitBy(blast) {
    if (this.size > 20) {
        // Split into two pieces
        this.size *= 0.7;
        this.da *= 1.5;
        this.dx = -blast.dy * 10 / this.size;
        this.dy = blast.dx * 10 / this.size;
        
        // Create the other piece
        Asteroid.create({ 
            size: this.size, 
            x: this.x, y: this.y, a: this.a, 
            dx: -this.dx, dy: -this.dy, da: this.da 
        });
    } else {
        this.destroy(); // Too small, destroy completely
    }
    blast.destroy();
}

Performance insight: Even with hundreds of moving objects, there’s no network congestion because positions are computed locally and synchronized automatically!

Step 5: Turn Ship Into Debris After Colliding with Asteroids 🚀➡💥

📖 Step 5 Resources

Add ship-asteroid collisions! When ships hit asteroids, they turn into debris.

Ship Damage State

Ships track their damage state with a wasHit property:

move() {
    if (this.wasHit) {
        // Keep drifting as debris for 3 seconds
        if (++this.wasHit > 60) this.reset();
    } else {
        // Process thruster controls
        if (this.forward) this.accelerate(0.5);
        if (this.left) this.a -= 0.2;
        if (this.right) this.a += 0.2;
    }
    // ... position updates ...
}

Visual Debris Effect

The view shows exploded ships with scattered line segments:

// Normal ship
if (!wasHit) {
    this.context.moveTo(+20,   0);
    this.context.lineTo(-20, +10);
    this.context.lineTo(-20, -10);
    this.context.closePath();
} else {
    // Exploded ship - segments fly apart
    const t = wasHit;
    this.context.moveTo(+20 + t,   0 + t);
    this.context.lineTo(-20 + t, +10 + t);
    this.context.moveTo(-20 - t * 1.4, +10);
    this.context.lineTo(-20 - t * 1.4, -10);
    this.context.moveTo(-20 + t, -10 - t);
    this.context.lineTo(+20 + t,   0 - t);
}

The wasHit counter determines how far each line segment has drifted from the original position, creating a realistic explosion effect.

Step 6: Score Points When Hitting an Asteroid with a Blast 💥➡🏆

📖 Step 6 Resources

Add scoring! Players earn points for destroying asteroids.

Blast Ownership

Store a reference to the firing ship in each blast:

fireBlaster() {
    const dx = Math.cos(this.a) * 20;
    const dy = Math.sin(this.a) * 20;
    const x = this.x + dx;
    const y = this.y + dy;
    Blast.create({ x, y, dx, dy, ship: this }); // ← Ship reference
}

Scoring System

When asteroids are hit, the firing ship gets points:

hitBy(blast) {
    blast.ship.scored(); // ← Award points to the shooter
    // ... asteroid destruction code ...
}

Score Display

The view displays each player’s score and highlights their own ship:

update() {
    // ... other rendering ...
    
    // Display score next to ship
    this.context.fillText(score, 30 - wasHit * 2, 0);
    
    // Fill our own ship to distinguish it
    if (viewId === this.viewId) {
        this.context.fill();
    }
    
    // ... rest of rendering ...
}

Players can easily identify their own ship because it’s filled instead of just outlined.

Step 7: View-Side Animation Smoothing 🤩

📖 Step 7 Resources

Add 60fps animation smoothing! The model updates at 20fps, but we render at 60fps for smooth visuals.

Why Smoothing?

  • Model: Updates at 20fps (50ms intervals) for reliable synchronization
  • View: Renders at 60fps (16ms intervals) for smooth animation
  • Solution: Interpolate between model positions for smooth rendering

Smoothing Implementation

Use a WeakMap to store rendering positions separate from model positions:

class Display extends Multisynq.View {
    constructor() {
        super();
        this.smoothing = new WeakMap();
    }

    smoothPos(obj) {
        if (!this.smoothing.has(obj)) {
            this.smoothing.set(obj, { x: obj.x, y: obj.y, a: obj.a });
        }
        
        const smoothed = this.smoothing.get(obj);
        const dx = obj.x - smoothed.x;
        const dy = obj.y - smoothed.y;
        
        // If distance is large, don't smooth (object jumped)
        if (Math.abs(dx) < 50) smoothed.x += dx * 0.3; 
        else smoothed.x = obj.x;
        
        if (Math.abs(dy) < 50) smoothed.y += dy * 0.3; 
        else smoothed.y = obj.y;
        
        return smoothed;
    }
}

Rendering with Smoothing

Use smoothed positions for rendering:

update() {
    for (const asteroid of this.model.asteroids) {
        const { x, y, a } = this.smoothPos(asteroid);  // ← Smoothed position
        const { size } = asteroid;                     // ← Direct from model
        
        // ... rendering code uses smoothed x, y, a ...
    }
}

The smoothing factor of 0.3 works well for 20fps simulation with 60fps rendering, but can be adjusted for different scenarios.

Step 8: Persistent Table of Highscores 🥇🥈🥉

📖 Step 8 Resources

Add persistent highscores that survive code changes!

Understanding Persistence

  • Multisynq automatically saves session state
  • State persists when all players leave
  • BUT: Code changes create new sessions

Player Initials

Add an input field for player names:

initials.onchange = () => {
    localStorage.setItem("io.multisynq.multiblaster.initials", initials.value);
    this.publish(this.viewId, "set-initials", initials.value);
}

// Auto-restore from localStorage
if (localStorage.getItem("io.multisynq.multiblaster.initials")) {
    initials.value = localStorage.getItem("io.multisynq.multiblaster.initials");
    this.publish(this.viewId, "set-initials", initials.value);
}

Highscore Management

Initialize highscores from persistent data:

class Game extends Multisynq.Model {
    init(_, persisted) {
        this.highscores = persisted?.highscores ?? {};
        // ... other initialization ...
    }

    setHighscore(initials, score) {
        if (this.highscores[initials] >= score) return;
        
        this.highscores[initials] = score;
        this.persistSession({ highscores: this.highscores });
    }
}

Scoring with Persistence

Update highscores when players score:

scored() {
    this.score++;
    if (this.initials) {
        this.game.setHighscore(this.initials, this.score);
    }
}

Important: Design your persistence format carefully! Include version numbers so future code can interpret data from older versions.

Step 9: Support for Mobile etc. 📱

📖 Step 9 Resources

The final version with mobile support and polish!

Mobile Features

  • Touch controls for mobile devices
  • WASD keys in addition to arrow keys
  • Visible thrusters for better feedback
  • Wrapped drawing for seamless screen edges
  • Spawn protection to prevent immediate destruction

Wrapped Rendering

Objects near screen edges are drawn on both sides:

drawWrapped(x, y, size, draw) {
    const drawIt = (x, y) => {
        this.context.save();
        this.context.translate(x, y);
        draw();
        this.context.restore();
    }
    
    drawIt(x, y);
    
    // Draw again on opposite sides if object is near edge
    if (x - size < 0) drawIt(x + 1000, y);
    if (x + size > 1000) drawIt(x - 1000, y);
    if (y - size < 0) drawIt(x, y + 1000);
    if (y + size > 1000) drawIt(x, y - 1000);
    
    // Handle corners (4 additional draws)
    if (x - size < 0 && y - size < 0) drawIt(x + 1000, y + 1000);
    if (x + size > 1000 && y + size > 1000) drawIt(x - 1000, y - 1000);
    if (x - size < 0 && y + size > 1000) drawIt(x + 1000, y - 1000);
    if (x + size > 1000 && y - size < 0) drawIt(x - 1000, y + 1000);
}

Advanced Game 🚀💫

🎮 Even More Features

There’s an even more polished version with additional features at github.com/multisynq/multiblaster:

  • Emoji shooting - If your initials contain an emoji, you shoot that emoji!
  • Advanced graphics - Enhanced visual effects and animations
  • Better mobile UX - Optimized touch controls and responsive design

Play it at apps.multisynq.io/multiblaster

Key Takeaways

Next Steps

Remember: This tutorial shows just one way to structure a multiplayer game. Multisynq is flexible - you can adapt these patterns to fit your specific game design and requirements.